How to create YouTube channel?

In this post, we will walk you through how to create YouTube channel step by step.
YouTube has become the second most popular search engine in the world. That’s why more and more people wanna get on the platform, and learn how to make their own videos.
Let’s get started!
The first thing you need to do is to head over to YouTube.com, and click Sign in. Sign in button is in the top right-hand corner. If you already got a Google Account or a Gmail e-mail address, you can log in with that.
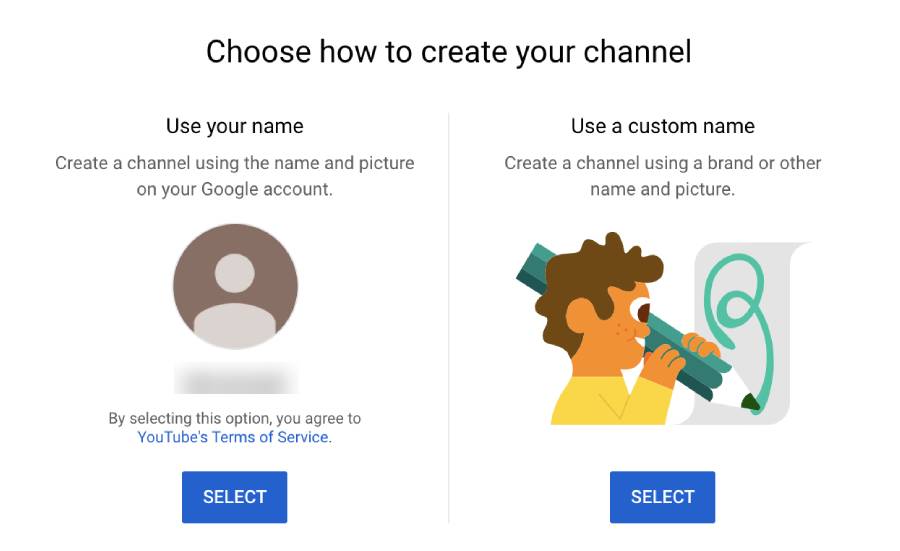
In the Sign In section on YouTube, you can create an account in two ways: for yourself or manage your business.
If you choose to create it for yourself, it’s gonna be restricted to your own name.
If you choose to create it to manage your business, it doesn’t have to be your personal name, and you can assign other people and accounts as channel managers, and you don’t have to give them your personal Google account details, you can grand them access with their Log-in details.
Do you want to change your personal channel to a business channel, later on? Don’t worry, you can do that.
When you finish all this above, on your right corner you can see your account. Click on your account icon and now you can Create a Channel.
Here you can choose to use your own name or use a custom name.
If you choose not to use your own name, we can suggest using a topic your channel will be about. If you want to, it is possible to change your channel name afterward.
Profile Picture
The next step is to upload a profile picture.
Tell your viewers about your channel. Let them know who you are, what this channel is about, etc. It’s important to add some keywords about your channel and some tags, and also inside the videos themselves later on.
When all this is done, you can add your social media to your account.
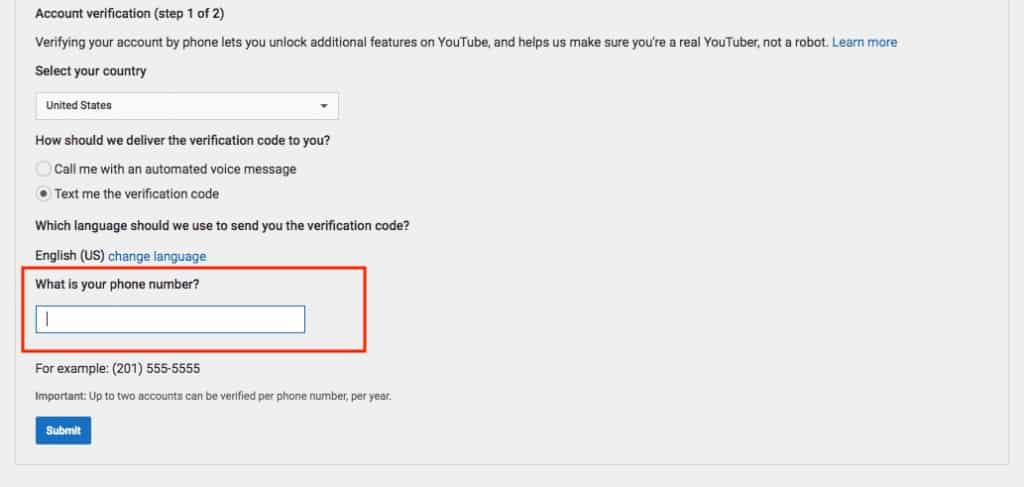
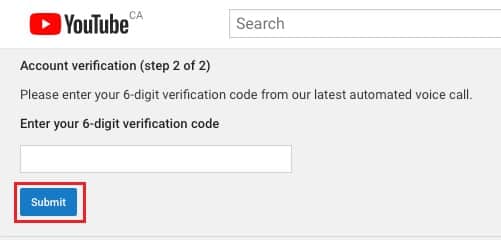
Then you have to verify your channel. Go to profile picture- Settings – Status and Features- Verify (you can get a text message or a voice mail).
Create a YouTube Banner
When you create a YouTube channel, don’t forget the banner!
A banner is the first thing that a potential subscriber will notice on your channel.
Go to Return to youtube studio- view your channel on youtube- customize channel- now you can add channel art that looks like your brand.

If you don’t have any editing software, don’t worry, you can use free editing software like Canva that works just fine. Channel arts look different on desktop, mobile, and TV displays. For best results on all devices, the recommendation is a 2560×1440 px image. File size 6MB or smaller. You can download a template on YouTube (Image tips and guidelines section- ”Channel Art Templates”- go and download it – upload it on any editing software and implement it on your blank canvas), that will help you to know what part of your banner will show on desktop, what on mobile devices, etc. And the most important things you want your subscribers to know must be in the center, so it shows on any device (channel name, what’s your channel is about, etc).
To place your banner go to your YouTube channel, log in and go and click the ”Customize channel” button. On top of your channel, you click on the ”Add Channel Art” button and upload your photo. Now you can see what your banner looks like on mobile, desktop, and tablet, if you didn’t follow the directions above, now you can reposition it. Then you can make the ”call to action” section. Put your email or subscribe button here. Bear in mind that this section is visible only in desktop mode. That’s why it must fit inside the ”desktop range”, and outside of ”mobile range” (which is in the middle)

Create videos on your YouTube channel
When you create a new YouTube channel, you have to start to think about your videos and the content in them!
Some value-adding YouTube content is: inspirational, educational, entertaining, etc.
Planning
Before you start filming a video, you have to plan the topic you wanna cover. It doesn’t have to be a fully flushed script. It can be an outline, breaking down the topics you want to touch on.
Filming
Always do some checks before shooting your YouTube video!
- Find good camera angles
- Make sure audio quality is good
- Have good lighting
- Set a reminder to backup your footage
- Charge your batteries after every shoot
Editing
At the start, it is best to learn the fundamentals and improve on the basics.
Now you can search for background music for your video, to make it even better!
How to make an animated YouTube video intro?
Animated video intros are an awesome way to brand your videos.
There are some tools to make creating your video intro easy.
You can use a template from pages like VideoHive on the Envato market. That way you don’t have to start from scratch. This is a good option, but, it requires Adobe AfterEffects to customize it.
Another option is called Placeit, where you can customize the intro for your videos on their website. It is cheap and easy to customize. On Placeit you can customize social media content and even YouTube end cards.
Of course, in your intro, it is recommended to have some catchy music playing. If you want, you can have some music in the background of your whole video. You can have one or more intro songs, it depends on the content of your videos. WaveToys has royalty free music, which you could use for your intros.
The Upload of the video, and optimization for search engine
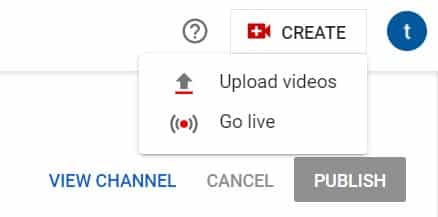
To upload your first video to YouTube, click the “Create” button in the top-right corner and then follow the instructions.
When you start adding videos, you’ll want to optimize them for search. That helps viewers to discover your videos.
In continuation of the article, we will emphasize some of the essential items in posting your videos.
Title of the video
When we search for videos, one of the first things that our eyes are drawn to is the title. Here’s where we determinate if we will click on the video or not. That’s why the title should not only be compelling but also clear.
Description
Remember, the viewer did not come to read, but to watch the video. The description should be limited to 1,000 characters.
Be careful that the audience won’t be overwhelmed by the amount of text in the description.
Category
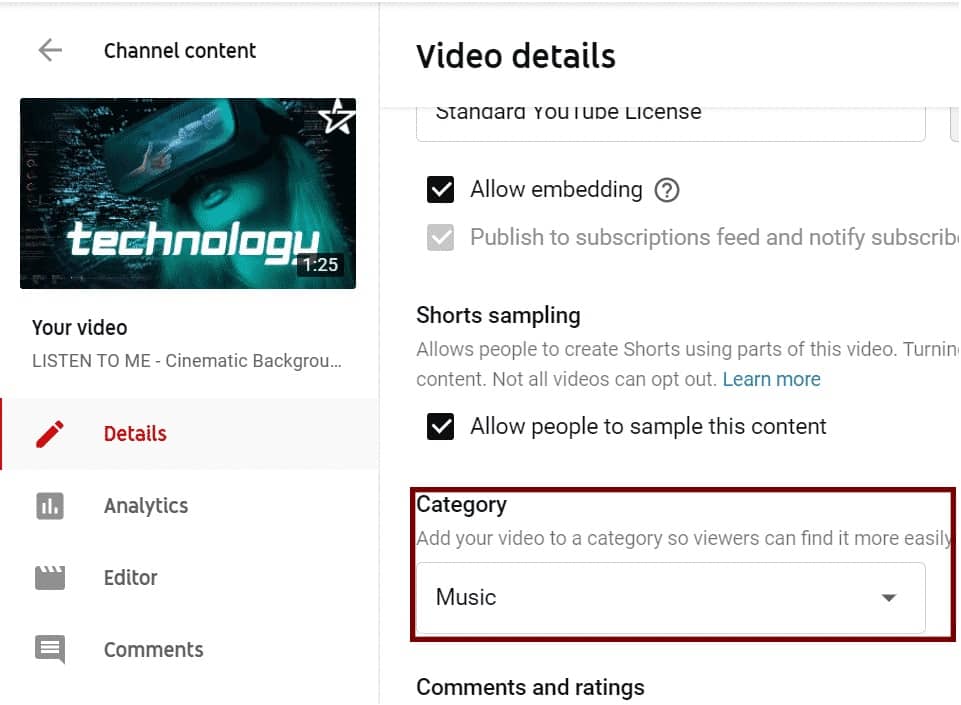
This is another way to group your video with similar content on YouTube.
Tags
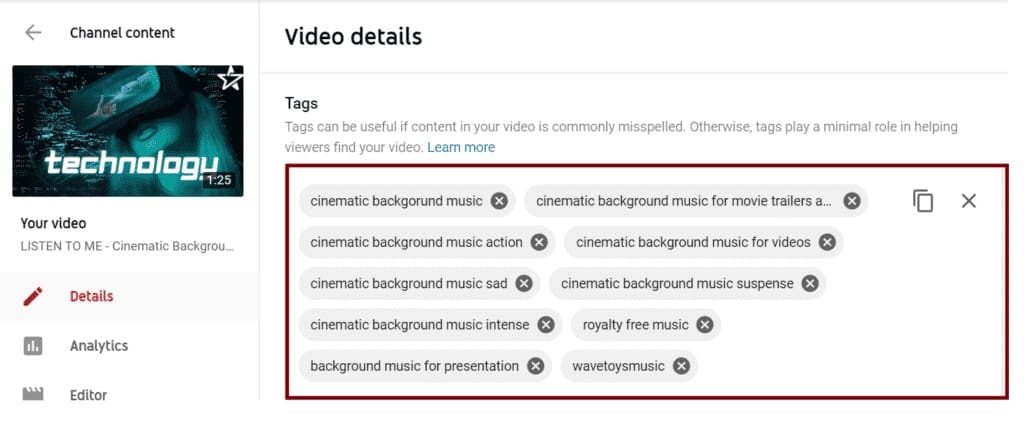
Using tags doesn’t just let viewers know what your video is about, they inform YouTube, too. YouTube uses tags “to understand the content and context of your video”. That way, YouTube can associate your video with similar videos, and help new audiences to find your content.
Creating a thumbnail for YouTube videos
Thumbnails are one of the most important elements of getting views on your videos.
The biggest misconception is that you need Photoshop for creating a great and attractive thumbnail. If you don’t have Photoshop, don’t worry, there are free editing software like Canva that will help you with that.
You can use yourself for a thumbnail. Then it’s recommended that at the end of your video, you make few poses, and pull a freeze-frame for your thumbnail. For example, you can point on different things, and then add text with Canva on your thumbnail).
Recommended dimensions of your canvas for your thumbnail are 1920×1080 px.
The important text you want to show should not be in the top right corner, or right at the bottom. YouTube settings could cover it up when the mouse hovers over your video.
Create A YouTube End Card Template?
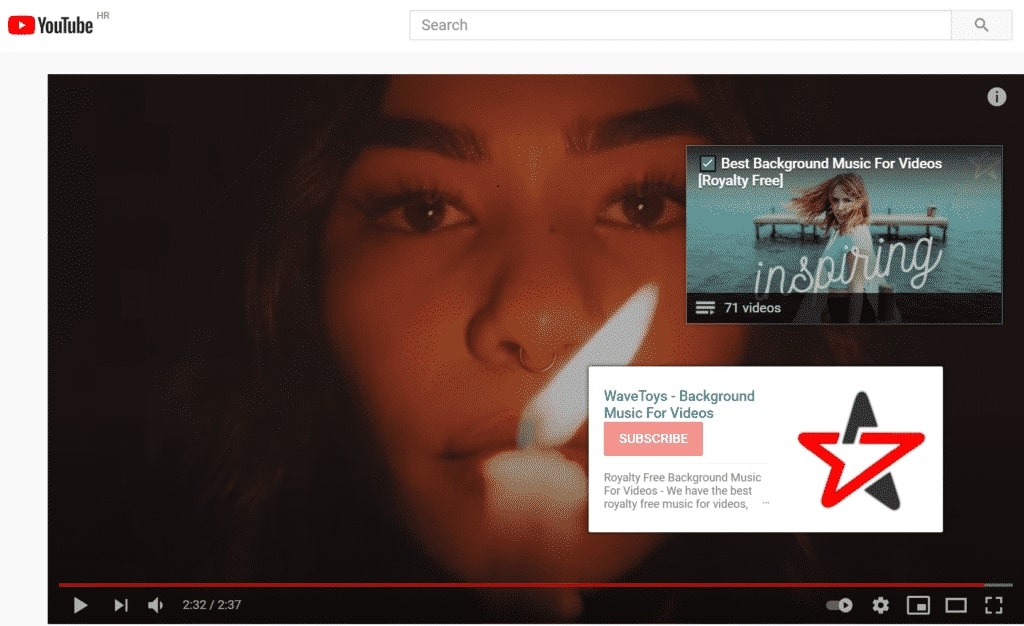
You can make it in few minutes, and for free. They are an incredibly powerful tool for increasing views on your channel.
This can help with YouTube rankings by increasing viewer session time. Whit the end card template you can give your viewer a clear next step, whether that be a related video or a subscribe button.
You can use free software like Snappa.
When you finish editing your end template, you can go to your uploaded video, and click the ”Edit” button. Then go to ”Edit screen and Annotations” – here you can upload your end screen (max length is 20sek). Here you can reposition the images on your end screen, so they fit your brand. The outro of your video can have some catchy music playing also, you can find it on the WaveToys site.
Conclusion
There you go, now you have the information to create a YouTube channel!
It might go smoothly or with obstacles. We are sure your own YouTube channel will be something you are incredibly proud of!
Now, get ready for uploading new content. The job of a YouTuber is never complete, there is always another video to make.
Don’t forget to subscribe on YouTube, so you don’t miss great royalty-free music and offers in the future!
Good luck!

